Mastering Redux: A Beginner's Guide to State Management in React
Best Guide to Learn React-Redux


Introduction
In this guide, we will delve into the world of Redux, a popular React state management library. You will have a solid understanding of how to use Redux to manage the state of your React applications by the end of this post.
What is Redux?
Redux is a JavaScript library that allows you to centrally manage the state of your application. Dan Abramov created it in 2015, and it has since become one of the most popular state management libraries for React.
Why Use Redux?
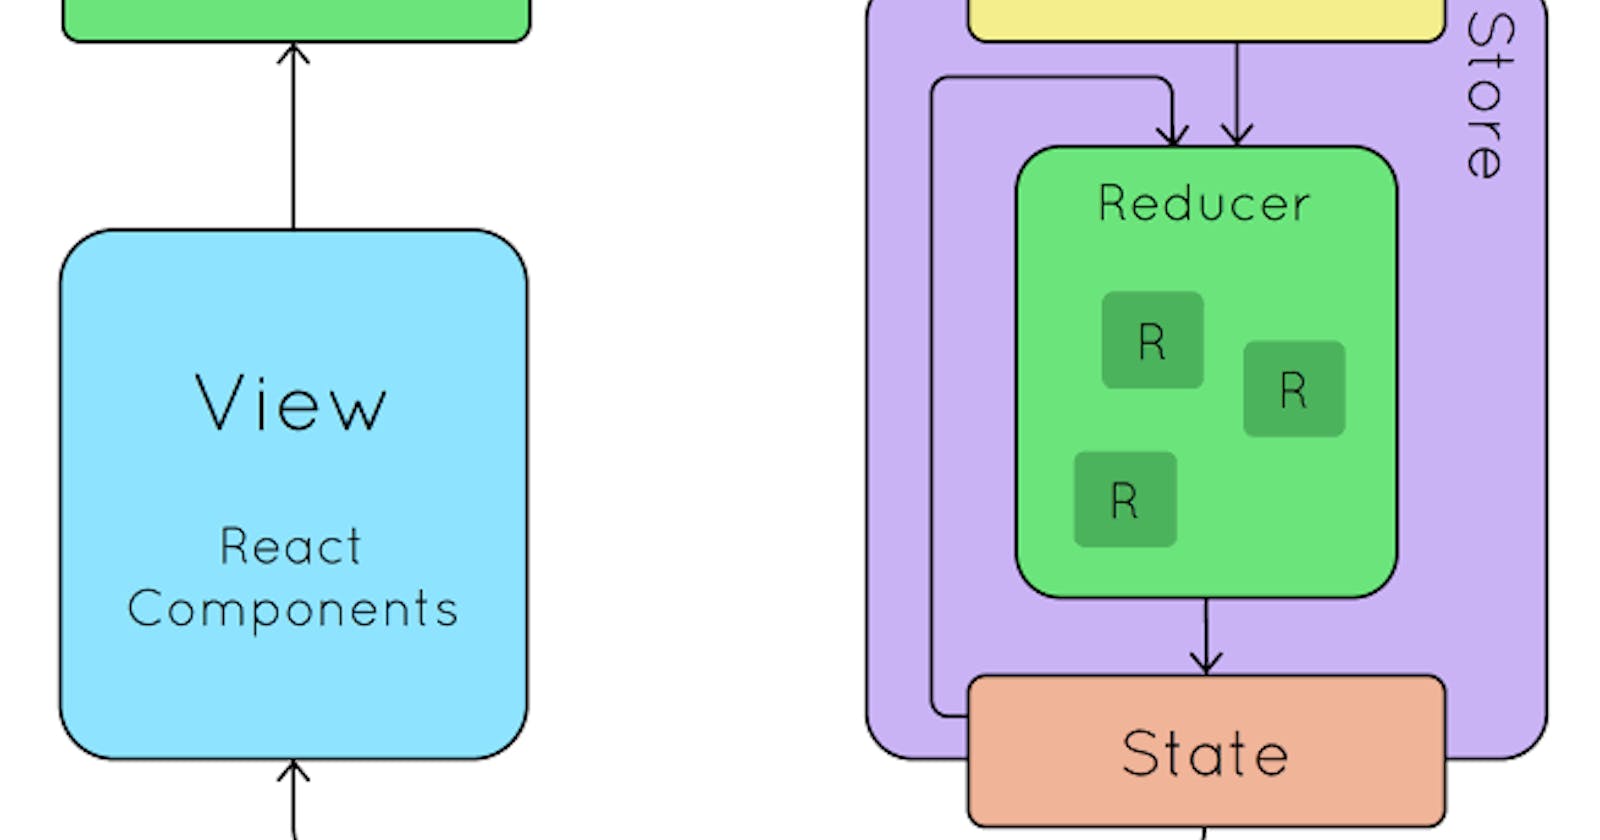
One of the primary advantages of using Redux is the ability to manage the state of your application in a centralized location. This facilitates the understanding and debugging of your code, as well as the implementation of features such as undo/redo and time-travel debugging.
Redux also makes it simple to share state between different components in your application. This is especially useful for large, complex applications in which multiple parts require access to the same data.
Getting Started with Redux
To begin using Redux, you must first install the library by running the following command:
npm install redux
Or
yarn add redux
Depending on the package manager of your choice.
Next, in your project, create a new file called store.js where you will configure your Redux store. In this file, you must import the redux library's createStore function and then call it to create a new store.
import { createStore } from 'redux';

const store = createStore(reducer);
The function createStore takes a single argument, a "reducer" function. This function is in charge of updating your application's state in response to actions.
const reducer = (state, action) => {
    switch (action.type) {
        case 'INCREMENT':
            return { count: state.count + 1 };
        case 'DECREMENT':
            return { count: state.count - 1 };

        default:
            return state;
      }
};
In the preceding example, we defined a simple reducer function that, depending on the action type, increments or decrements a count value in our state.
Finally, you must connect your React components to the Redux store in order for them to access and update the state. You'll need to use the connect function from the react-redux library to accomplish this.
import { connect } from 'react-redux';

const mapStateToProps = state => ({ count: state.count });

const mapDispatchToProps = dispatch => ({ increment: () => dispatch({ type: 'INCREMENT' }), decrement: () => dispatch({ type: 'DECREMENT' }) });

const ConnectedComponent = connect( mapStateToProps, mapDispatchToProps )(MyComponent);
In the preceding example, we're using the connect function to create a new "connected" component that can dispatch INCREMENT and DECREMENT actions and has access to the count value from the Redux store.
Conclusion
We've covered the fundamentals of using Redux to manage the state of your React applications in this guide. While there is still much to learn,